Images generally lose their quality and are damaged by the low-quality JPEG compression. JPEG Enhancer uses an intellectual science-intensive technology to actually recover your images and to make them look like they did before the JPEG compression.
It uses a unique technology that lets even the novice users effectively remove so-called "JPEG artifacts" and "blotchy look" from his/her images, giving them the super-file quality look.
There are basically three simple steps to recover an image:
Step 1:
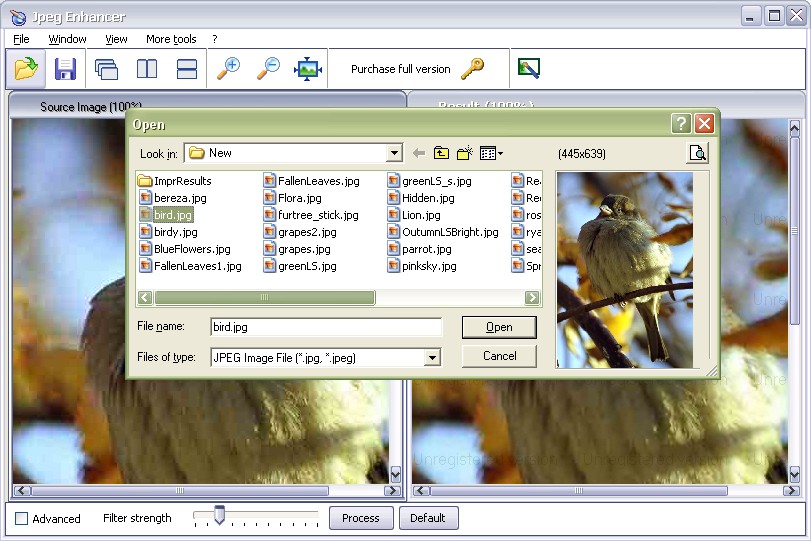
Load the image - Click the Open file icon to open the image from your documents. As seen in the screenshot below, it opens a browser window and you need to select the image and click Open . Image will be processed with the default parameters immediately after opening.
Step 2:
Process the image - As seen in the screenshot below, the default processing generally recovers the image quality to a great extent. If you need to process further, set the Filter strength parameter and click Process. Your image will be recovered from the damages, occurred due to a low-quality jpeg compression.
This program also allows you some advanced filtering and smoothing options. Click the Advanced checkbox. The following toolbar will be displayed.

Adjust any of the options as per your requirement and click the Process button for the changes to take effect.
Step 3:
Save the image - Click the Save image as icon on the main toolbar or the Save As option on the File menu to save the changes made to the image.
The browser window opens up, allowing you to specify your own path for the image. Select the destination for the file and also specify format as *.bmp, *.jpg or *.png. Click the Save button.
VicMan Software-All rights reserved.